

AR image targets: how to pick a picture that tracks well
 Advice

An image target (also called a trigger or marker) is the picture that starts your AR: a poster, a package, a business card, a photo on a screen. A visitor points a phone at it, and your content appears on top.
When AR "doesn't work", the picture is usually to blame, not the phone. The good news: you can check a picture in a minute, before anything goes to print.
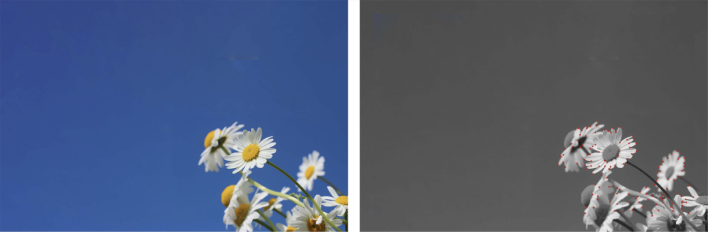
The one-minute check
Look at your picture and ask:
- Does it still read in black and white?
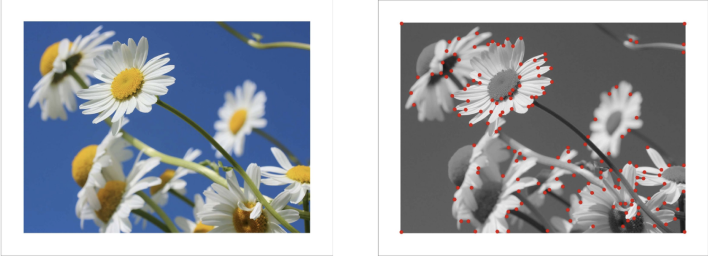
- Is it full of small, irregular detail, without big empty areas?
- Is the detail spread over the whole picture, not packed into one corner?
- Is there nothing that repeats, like tiles, grids or rows of identical icons?
- If you rotated it, could you still tell which way is up?
- Will it be printed matte and stay flat?
Six "yes" answers and you are almost certainly fine. Each "no" is explained below, with a fix.
What the camera looks for
The tracker doesn't see "a cat" or "a logo". It looks for feature points: small spots where brightness changes sharply, such as corners, edges and texture. The more points there are, and the more evenly they are spread, the faster the picture is found and the steadier your content sits on it.
Image trackers typically work with brightness, not colour. A red logo on a green background can look bold to you and still be one flat grey to the camera.
7 rules for a picture that tracks
1. Strong contrast
Make a grayscale copy. If it turns into one muddy grey, raise the contrast or choose another image.
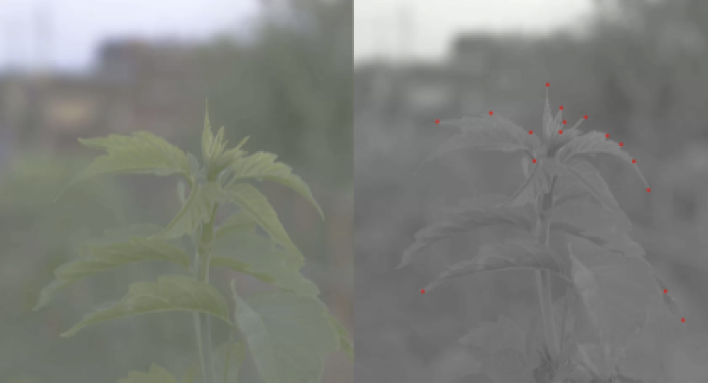
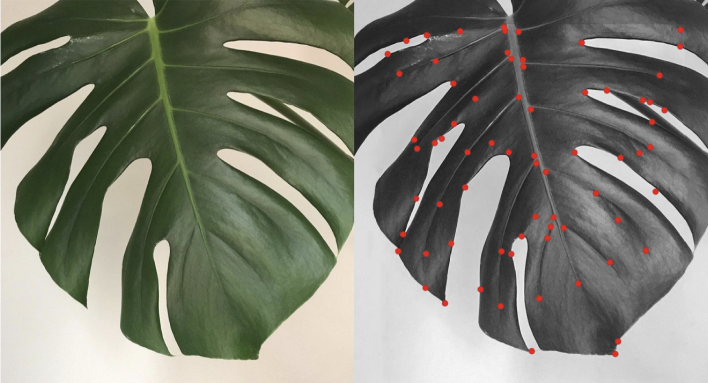
2. Lots of irregular detail
Photos, textured illustrations and busy artwork track well. A logo on white, big gradients and lots of empty space don't, because the camera has nothing to hold on to. A bigger file won't rescue a plain picture: detail and contrast matter more than resolution.
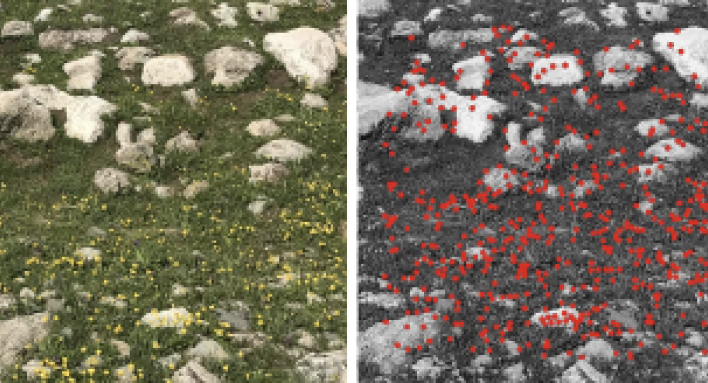
3. Nothing that repeats
Brick walls, tiles, checkerboards, a row of identical icons: the camera finds plenty of points, but they all look alike. It mixes them up, and the content jitters.
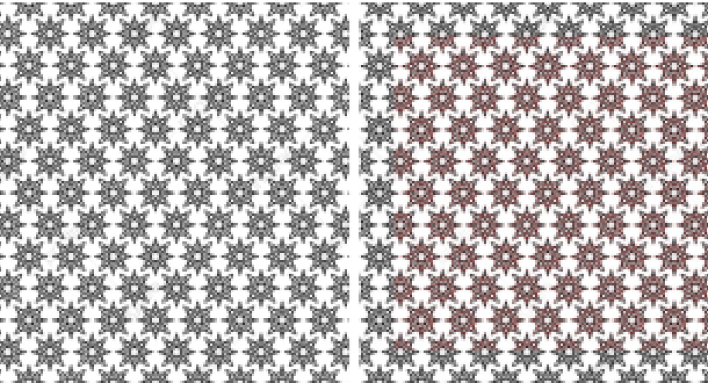
4. Detail across the whole picture
If all the detail sits in one corner, tracking weakens as soon as that corner leaves the frame. Crop the empty part, or add elements to it.
5. No symmetry
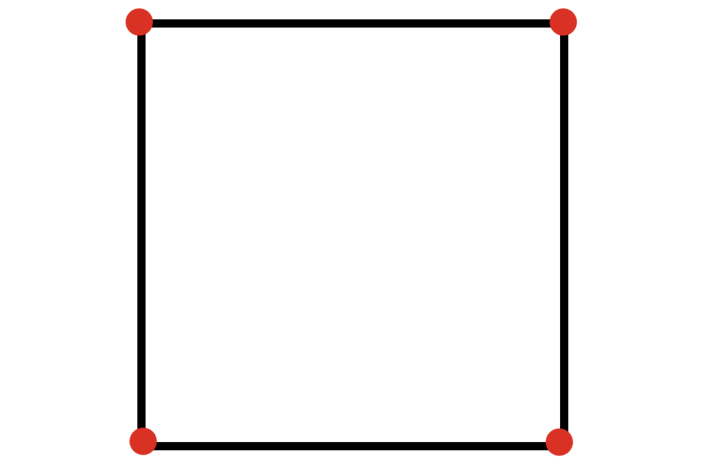
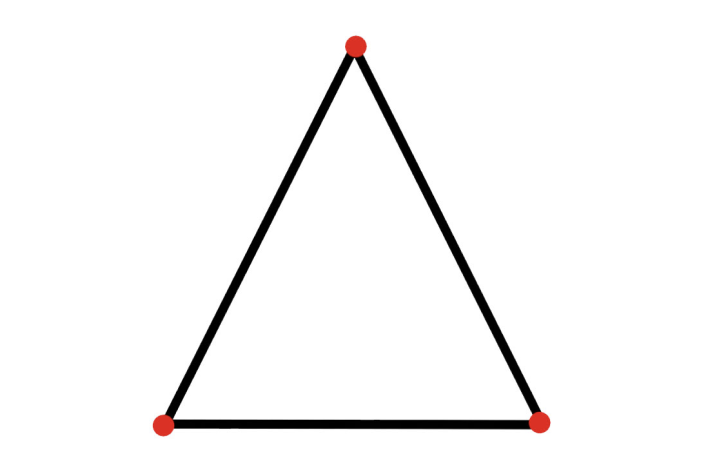
A square looks the same after a 90° turn, so the camera can't tell which way is up. Any asymmetric composition solves this.

6. Upload exactly what you print
The camera compares the real print with the picture you uploaded. Use the final artwork with the same crop, as a raster image (PNG or JPG), not a vector file. If you only have the printed object, photograph it straight on and upload the photo. And if the designer changes the layout later, upload the new version too, or the old one will stop matching.
7. Matte and flat
Glossy paper, lamination and shiny packaging throw glare that hides detail. Flat surfaces work best: a picture that bends around a bottle or wrinkles on a bag is harder to recognise.
Size and distance
Think about where people will stand. A business card is scanned up close, a poster on a wall from a few steps away, a billboard from across the street. The picture has to fill a good part of the phone screen from that distance, so a small picture far away will struggle however good it is.
Check the scale of your content against the real print too. A 3D model that looks right on a poster can look huge on a business card.
Set it up in Web-AR.Studio
- Create a project in WAS Design Studio and choose photo tracking. For a quick template project, such as a living photo, WAS Lite Studio is enough: you attach files and fill in fields.
- Upload the picture you will print.
- Add your content on top: a video, a 3D model, images, text.
- Decide what happens when the picture leaves the frame. With screen fixation, set in the project's advanced settings, the content can stay on the screen instead of disappearing as soon as the hand shakes.
- Publish the project and open it on a phone, pointed at the real print.
- Share the link or QR code. It opens in the phone's browser, with nothing to install.
Tip: one project can use several pictures, and one picture can start more than one scene. That is how you make a whole album, or a poster that opens chapter one today and chapter two later.
Test like a visitor
- Two or three phones, including an older one.
- Daylight, evening light, and under a lamp to catch glare.
- At an angle, not only straight on. A picture that works straight on can fail at an angle, and that's usually what needs fixing.
- The real print, at its real size, in the place where people will see it.
If it still won't track
| What you see | Likely cause | Fix |
|---|---|---|
| Content never appears | Too little detail or contrast | Busier picture, more contrast |
| It appears, then jitters | Repeating pattern, or detail in one corner | Remove repetition, spread the detail |
| It flickers near a lamp | Glare | Matte print, move the light |
| It works close up but not from afar | The picture is too small for the distance | Print it bigger, or invite people closer |
| It vanishes when the hand shakes | Content hides when the picture is lost | Turn on screen fixation |
| It stopped working after a design change | The uploaded picture is the old version | Upload the final artwork |
Generated the artwork with AI?
The Web-AR.Studio editor can generate images from a text prompt. A generated picture needs the same one-minute check as any other: AI art is often smooth and soft, which is exactly what trackers dislike. Add texture and detail, then test it on a phone.
Making a print that plays a video? Read how to make an AR living photo. For the rest of the experience, from the call to action to the loading screen, see AR design and UX: 10 rules.
Try it: build your first image-tracking project in WAS Design Studio. The basic features are free, with no time limit.
FAQ
Can I use my logo as the target?
On its own, usually not: a logo on white has too little detail. Place it on a detailed photo or illustration instead.
Does it work with a picture on a screen?
Yes. You can point the phone at a picture shown on a monitor, which is handy for testing. Screen glare can still get in the way.
Which file should I upload?
The final artwork as a raster image, PNG or JPG, cropped exactly like the print. Don't upload a vector file.
Do visitors need an app?
No. A published project opens from a link or a QR code in the phone's browser.
Recommended articles


Learn more about how to use Web-AR.Studio
We'll show you how to do this and answer all your questions in our educational AR webinar!
AR.Studio Cookie Notice
We use cookies that are necessary to run this site, and analytics cookies only if you accept. You can change your choice at any time. More details
